Chop Saw Table: The Ultimate Guide for Woodworkers and Metalworkers
A chop saw is a powerful tool designed for making precise and clean cuts in various materials, including wood, metal, and plastic. However, to maximize efficiency and safety, a chop saw table is an essential addition to any workshop. It provides stability, improves accuracy, and enhances overall workflow. In this guide, we will explore the benefits, types, features, and how to build a chop saw table for your needs.
Why You Need a Chop Saw Table
A chop saw table offers several advantages, making it an indispensable asset for professional and DIY projects. Here are some key benefits:
- Enhanced Stability: Prevents the saw from wobbling, ensuring precise cuts.
- Improved Accuracy: Allows for consistent and repeatable cuts with minimal errors.
- Increased Safety: Reduces the risk of accidents by providing a secure platform.
- Better Workflow: Offers a designated work area, keeping tools organized and accessible.
Types of Chop Saw Tables
There are several types of chop saw tables, each designed to cater to different needs and preferences. Understanding these variations will help you select the right one for your workshop.
1. Fixed Chop Saw Table
A stationary workbench designed specifically for a chop saw. It provides durability and stability but is less portable.
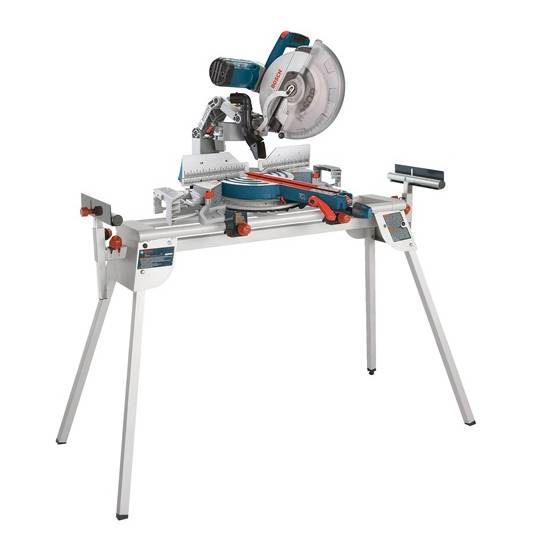
2. Portable Chop Saw Table
Ideal for contractors and professionals who need mobility. These tables often come with folding legs and wheels for easy transport.
3. Adjustable Chop Saw Table
Features extendable arms or supports that allow customization based on material length, making it perfect for cutting long pieces of wood or metal.
4. DIY Chop Saw Table
Custom-built to suit specific needs and space constraints. These are often budget-friendly and can be modified as required.
Features to Look for in a Chop Saw Table
When selecting a chop saw table, consider the following features to ensure optimal performance:
1. Sturdy Construction
A solid and well-built table is crucial for stability and durability. Look for materials like steel or heavy-duty wood.
2. Adjustable Supports
Tables with adjustable extensions allow for handling longer materials with ease.
3. Clamping System
A good chop saw table should have built-in clamps to hold materials securely, preventing movement during cutting.
4. Dust Collection System
Some tables include dust ports or collection trays to maintain a clean workspace and reduce airborne particles.
5. Foldable and Portable Design
For those who require mobility, a table with foldable legs and wheels is a great choice.
6. Compatibility
Ensure the table is compatible with your chop saw model and can support the saw's weight and dimensions.
How to Build a DIY Chop Saw Table
For those who prefer a custom setup, building a chop saw table is a great option. Here’s a step-by-step guide to creating your own.
Materials Needed:
- Plywood or MDF board
- 2x4 lumber for framing
- Screws and nails
- Sawhorse or table legs
- Measuring tape and level
- Drill and screwdriver
Step 1: Plan the Dimensions
Determine the size of your chop saw table based on the available space and the materials you frequently cut. A typical table is around 6-8 feet long.
Step 2: Build the Frame
Cut and assemble the 2x4s to create a sturdy rectangular frame. Secure the joints with screws for added stability.
Step 3: Attach the Tabletop
Fix the plywood or MDF board onto the frame, ensuring it is level and secure.
Step 4: Create a Saw Slot
Measure and cut a slot where the chop saw will be mounted, ensuring enough clearance for the blade movement.
Step 5: Add Supports and Extensions
Install side supports or extendable arms to accommodate longer materials.
Step 6: Secure the Chop Saw
Position the saw in the designated slot and fasten it using bolts or clamps.
Step 7: Final Adjustments
Check for stability, make necessary modifications, and test the table with sample cuts.
Maintenance and Safety Tips
A chop saw table requires proper maintenance and safety precautions to ensure longevity and accident prevention.
Maintenance Tips:
- Regularly inspect for loose bolts and screws.
- Keep the tabletop clean and free from dust buildup.
- Lubricate moving parts for smooth operation.
- Store the table in a dry area to prevent rust or warping.
Safety Tips:
- Always wear safety goggles and gloves.
- Secure materials with clamps before cutting.
- Keep hands away from the saw blade.
- Use a stable and level surface for the table.
Conclusion
A chop saw table is a must-have addition for woodworkers and metalworkers seeking precision, safety, and efficiency. Whether you opt for a ready-made model or build your own, investing in a high-quality chop saw table will improve your cutting accuracy and overall workflow. By considering essential features, types, and safety measures, you can select or construct the ideal table for your workshop.